
Victorian Tussie Mussies Page 2
Victorian Tussie Mussies Page
2
Supplies needed for
this tutorial:
PSP 7 (may be adapted to version 6)
Your lace piece from my Lace-Edged Hearts tutorial
~or~
you may download my lace tube
wompie pearl tube
~or~
a jewel tube of your choice
(Find some good ones at Jane's)
my Satin Tussie Mussie gradient
(download and unzip to your gradients file)
Your choice of flowers
(find some good ones at Jane's or
Jax's or
Backgrounds for Stitchers or
Wompietubes)
Ok, got all your supplies downloaded and unzipped? Let's make a tussie mussie!
Open a new image, 400 x 400 transparent background.
*Add a new raster layer.*
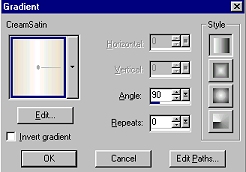
Set your foreground color to null and your background to the tussie mussie gradient
using these settings:

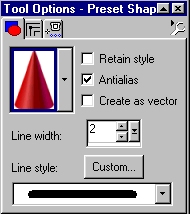
Use your preset shapes tool to draw a cone:
Flip the cone. ("Image"..."Flip")
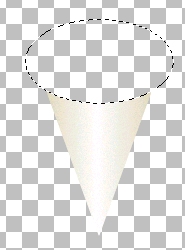
Use your selection tool, ellipse, to draw an ellipse at the top edge of the
cone. Hit the "Delete" key. Your cone should now look something like this:
Delselect. ("Cntrl"..."D")
Use your selection tool set to "rectangle" to draw a rectangle around the
cone, then click once inside the cone to select it. Add noise
("Effects"..."Noise"..."Add"..."4"..."Uniform" checked)
While the cone is still selected,
*Add a new raster layer.*
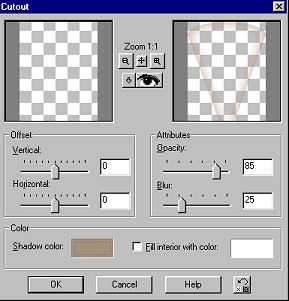
Apply a cut-out using these settings:
(cut-out color is #AC937E)
Now, switch your foreground and background so that the background is null and
the foreground is the tussie mussie gradient.
*Add a new raster layer.*
Drag this layer down under layer 2 (your cone layer). Using your draw tool with
these settings,
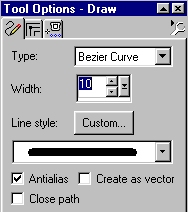
click above the cone and (without letting up on the mouse, drag a bezier
line down to just within the outer left edge of the cone. Let up on the mouse,
then click in both spots illustrated to set the bezier curve:
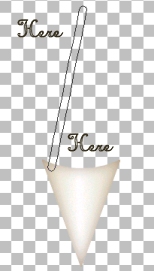
Your image should now look something like this:
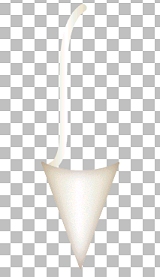
Now, use your mover tool to place the bezier curve at the edge of the left edge
of the cone. Use your selection tool set to rectangle to draw a rectangle all
around the bezier curve, then click once inside to select it. Apply a cut-out,
using the same settings as before, but change the blur to "2." Deselect. Copy ("Cntrl"..."C")
and paste as a new layer. ("Cntrl"..."L") Mirror this layer ("Image"..."Mirror")
and place it to the right edge of the cone.
*Add a new raster layer.*
Using your draw tool, same settings as before, draw your first bow loop by
DOUBLE-clicking in the middle of the top of your bezier curves where they join,
clicking one time to the left, then setting the loop by clicking below as
illustrated:

Use your selection tool to draw a rectangle around the loop, then click once
inside to select it. Apply a cut-out, same settings as before. De-select. Copy
and paste as a new layer. Mirror. Line up the loop to make a bow. You may add
another set of loops if you so desire. Just remember to add each loop in it's
own layer, and to apply the cut-out effect to each loop. You will also want to
add some streamers for each loop, using the same bezier technique you used for
the tussie mussie holder.
For the bow knot, I set the gradient back to background instead of foreground,
added a new raster layer, used my pre-set shapes tool set to "Sphere", and drew
a sphere. Place the sphere in the middle of your bow, select it the same way,
then add the cut-out using the same settings. Your image should now look
something like this:

Now, let's decorate our tussie mussie!


Victorian Cat Tube from Niche
Tubes by Jax.