Open your wompieplaquetut2.jpg and all of
your marble fills. Minimize your marble fills for now. Set your background color to white.
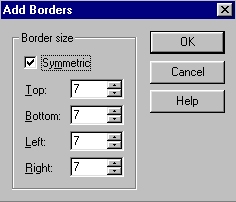
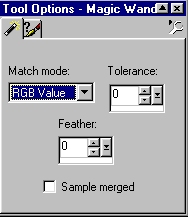
Add a border to your picture. (image...add border) (symmetric 7 pixel) Select the magic wand tool. Use these
settings: Touch the white border with the magic wand. You should see marching lines around it now.
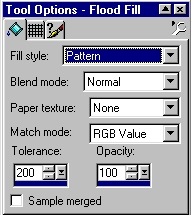
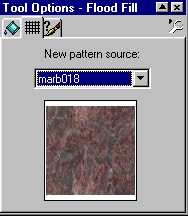
Select the flood fill tool. (the little paint bucket) Set your tool options palette like this:
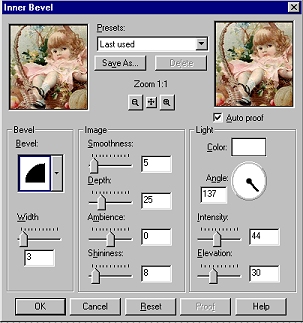
Flood fill your frame with this marble. While still selected, apply the Eye Candy filter. (image...plug-in filters...Eye Candy...inner bevel) Use these settings: Bevel width: 3 pixels If you don't have Eye Candy, use image...effects...inner bevel with these settings:
Now, de-select the frame. ("ctrl"..."D") Minimize this image for now. Follow wompie! |