De-select. ("Ctrl", "D") *Add a new raster layer.*
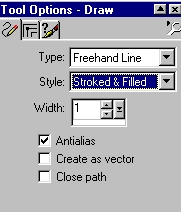
Open your layers palette. Delete Layer 2. (The layer with the Sweetheart font in it) Go back up to your last layer. **NOTE**CandyKis has illustrated the technique for making the loopy bow with an viewlet tutorial. This tutorial is for PSP7 and can be seen here. The bow is very easy to make once you have actually "seen" how it is done. Select the line tool. Use these settings:
Set your foreground color to black and your
background color to either white (if you want to flood fill ribbon with a pattern) or the
color you want your ribbon to be.
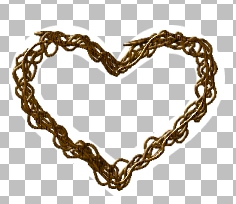
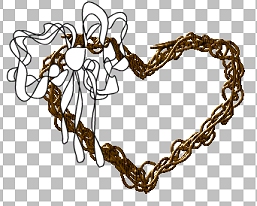
*Add a new raster layer.* Add as many loops as you like (each on their own separate layer) to get the fluffiness you want to your bow. *Add a new raster layer.* Using the same settings on your draw tool, add an irregularly-shaped circle for the loop of the bow. Add new raster layers under the loop layer to draw the streamers for your bow. Draw as many as you like, but put each one on it's own separate layer. Here's mine: (image reduced for faster loading)
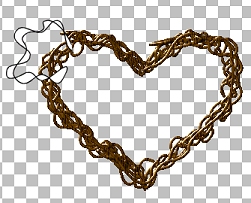
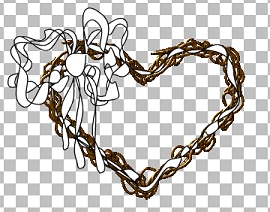
Now let's weave some ribbon through our wreath. *Add a new raster layer.* Draw a ribbon all the way around your wreath, starting just under the bow loop and looping back around, making sure not to let the starting point and the ending point meet. Your wreath should now look something like this: (image reduced for faster loading)
Follow wompie!
|