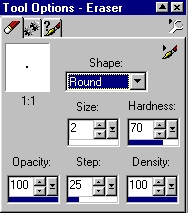
Find your ribbon layer on your layers palette. Change the opacity to about 75%. We are now going to give our ribbon the appearance of being "woven" through the grapevine wreath. Zoom in on your wreath using the magnifying tool. Select the eraser tool. Use these settings:
Erase a few parts of the ribbon so that it
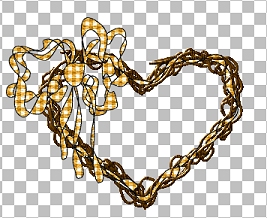
looks as if it were "woven" through the grapevine. We can now flood-fill our ribbon layers with a gingham or floral. Here are some ginghams I have made:
Learn how to make your own gingham here. You can use a floral fill, if you like. Jane has some beautiful ones you can find here. Open the gingham or floral of your choice in PSP. Using the same settings on your magic wand tool, select all of the white parts of your ribbon on one of the layers. (If you select one part, go to "selections", "modify", "select similar" and all of the parts of that layer will be selected.) Flood-fill with your pattern. Repeat on all ribbon layers. If you want to add texture to your ribbon, make all the other layers invisible, merge the ribbon layers, and add your texture. You can also use a floral fill and lower the transparency of the ribbon layers for a sheer look. I used the gold gingham fill and added a sandstone texture. Here is mine:
You can tube your wreath at this point. Add your favorite flower, a drop-shadow and the possibilities are endless! If you would like to see some finished wreaths I made, follow wompie!
|