*Add a new raster layer.* Load your birdhouse box selection. (Selections, load from disk) Flood-fill the selection with black. Use your magic wand tool to click inside the birdhouse. I set mine to a 14 tolerance. While it is still selected, add a new raster layer. Flood-fill this layer with the background fill you saved. Your image should now look like this: (image re-sized for faster loading)
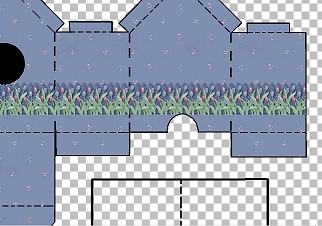
**NOTE** If you use a fill from wompietiles or Jane's tiles, re-size by 50% and sharpen. De-select. ("Ctrl"..."D") *Add a new raster layer.* Apply either tube border along the bottom of the box. Re-size tube to about 35%. Do NOT sharpen at this point. Copy the tube layer ("Ctrl"..."C") and paste as a new layer ("Ctrl"..."L") until you have the border all along the bottom of the box. If your border extends over the arch tab or the edge of the box, select that layer and use your eraser to any part of the border that extends over the edge of the box. Go to your layers palette and make every
layer except the border invisible. (image re-sized for faster loading) Make sure you have one of the border layers selected, then merge visible. (Layers...merge...merge visible) Sharpen the merged layer. (Effects....sharpen...sharpen) Add a drop-shadow if you wish. Make the other layers visible again. Here is what your image should look like now: (image re-sized for faster loading)
Now let's shingle our roof. Follow wompie!
|